CLICK HERE FOR FREE BLOGGER TEMPLATES, LINK BUTTONS AND MORE! »

Thursday, July 19, 2012

My Jungle Version of a Crate Seat~Bucket Style!

Let me just say that I {LOVE} all the crate seats out there and pinned them to my Summer-To-Do List. I really liked that they were functional seating.  I kept putting them off because the height of them bothered me.  I knew I wanted to use them at my reading table and I thought they were just too short.  After looking and looking for an alternative that was a bit taller....I finally came up with my version....and it turned out to be quite cheap.  (Thanks to my son for sitting on numerous storage containers and such to give a visual of the height I wanted!)  AND it only takes about 30 minutes to make each seat!

Here it is:

First off you're going to need some buckets.  And guess what?  We got ours donated from our friends at Lowe's.  {Thanks to them for absorbing the majority of the cost.}  If you can't get them donated it is about $4 for the bucket and lid.

Now to gather the rest of the supplies.  You will need a hot glue gun, some ribbon, scissors, fabric to cover the project and some stuffing. I bought pillowcases from Wal-Mart which were $5 for two.  They are the perfect size for this project and end up being cheaper than some of the fabric by the yard.  I also used an old pillow that was falling apart to add some cushion to the seat cover.  I got some discounted ribbon and already had the glue/glue gun.  So really the only cost for this project was the pillowcases and the ribbon.  Talk about cheap!

 
Step 1:
Slip the pillowcase over the bucket (opening at the bottom of the bucket).  Hot glue the end of the pillowcase around the bottom rim of the bucket.  It will be bunched in random spots.


Step 2:
Flip the bucket over and pull the pillowcase up tightly and cut off the top right at the top rim of the bucket.  After cutting the top off, hot glue the pillowcase to the top rim of the bucket.  Be sure to pull it up as you glue so it is tight.
Step 3:
Measure how much stuffing you will need for the bucket lid cushion.


Step 4: Take the remaining portion of the pillowcase and cut it in half along the seams.  Use one half and stuff it with the stuffing.  Loosely tie it to keep contained.  Flip it over so the knot is underneath.


Step 5:
 Flip the lid over and push down as you begin gluing the remaining portion of the fabric to the lid.  I apply a 2 inch section of glue to the inside rim of the lid then pull the fabric tightly and press into the rim.  Do this all the way around the rim.  Then trim off the excess fabric.


Step 6:
Time to finish it up!  I put ribbon around the bottom of the bucket to decorate, but also to make sure the fabric stays tight.  I also put a longer piece of ribbon around the top under the rim and tied a bow.  Again, this is for decoration and to keep the fabric in place.  (I applied some hot glue under the ribbon in a few spots to keep it in place.)  But I also attached an o-ring and a laminated card. 

My plan is to put leveled homework books into the buckets.  Each bucket will contain one level.  On the cards I will write student names so they know what bucket to get their books from.  On Monday morning they will choose their books for the week from their bucket.  On Fridays they will return their books to that bucket!  As the students progress in their levels I can switch their names Friday afternoon so it's ready for Monday morning. 


I am so excited to use these new bucket seats this year!

Monday, July 9, 2012

Pin-spiration: Writing Goals Chart

I was inspired by this pin on pinterest:


So I made this for my jungle themed classroom:

Love! If I do say so myself! I used a heavy duty overhead transparency, card stock, staples, ribbon and duck tape to put it all together. I made pockets to slide my goals in and out so they can be changed as the year progresses. I first stapled the transparency piece onto the card stock. 2 staples per side and 4 on the bottom, leaving the top open of course. Then I covered the staples with cheetah duck tape. Easy peasie!

The plan is to put student names on the clothespins, clip to the chart by the goal they are working on, and then move them as needed.  I am going to start the year with just 2-3 goals~depending on my students writing abilities.  (I will leave the bottom pockets empty until another goal is added.)

If you would like a copy of my goals for {FREE}, just answer one question:

What is the summer project on the top of your to-do list?
(school or non-school) 

Just leave me a comment with your email address and I will send it to you! 
(There are 10 goals in all.)

  
**UPDATE: These can be now downloaded for {FREE} at Teachers Pay Teachers.  Just click on the picture above!  Enjoy!

Thursday, July 5, 2012

Tired of Buying Desk Name Plates??

Me too!  So I made my own.  The ones I get from the teacher store only get about half used....meaning we use the name line, hundred chart and number line.  That's it.  So I decided to make name plates that only have that and match with our Saxon Phonics alphabet keyword/pictures.  That and they are jungle themed!  (There is a non-themed one that can be mounted onto any color or design).  I have them for sale in my TpT store for only $1.50.  The best part is I have 2 sets on there.  One with handwriting lines for you to write their names and one set that is fillable on the computer.  They are set to be printed on 8.5 x 14" legal paper.  Check them out! And never buy name plates again!!!!


First 3 to comment will get a copy of my nameplates for free!

Monday, July 2, 2012

I'm Baaaack! And I Have Some {FREEBIES}!

So I have been gone quite awhile.... I guess that's what happens when the end of the year sneaks up on you and then summer does too! I made it through the year and am now enjoying summer with my kiddos. I made lots of plans to get done this summer, but only little projects seem to be getting done. Oh well! So here are some things I have been up to. The first few are non-school related...

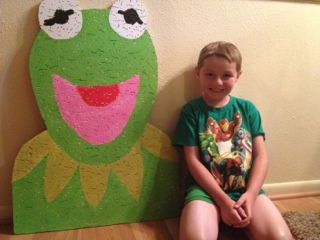
A bulletin board for my son, made from a ceiling tile and acrylic paint
A pinterest inspired weekly dinner planning board
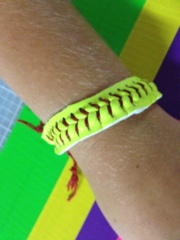
Softball bracelet for my daughter-who made All Stars!

End of the year gift for an IU obsessed teacher


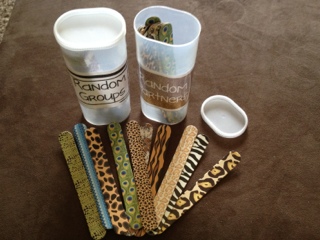
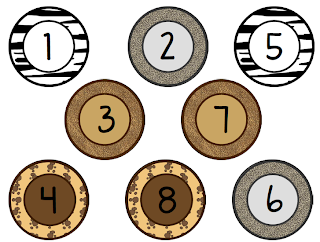
Now for a few school projects... I found these cool animal print craft sticks at Michaels.  There were 100 of them for I think $6 so I used my 40% coupon and they were mine!  I printed some circle animal numbers out, laminated, and glued to the sticks.  I am going to use these to call on students randomly for sharing time, lining up, picking out quiet reading spots, etc. 

Calling students by random
I then divided up the sticks in pairs to put into a random partner container.  I had to duplicate a couple so they have a star on the back.  The idea is for students to pull out a stick and then find their match-their random partner.  Same thing goes for random groups.  I put 6 sets of four sticks in the containers.  Students will pull out sticks and find their group.  (If you are wondering- the above container was a frosting jar and the containers below are crystal light containers.  I not only LOVE my crystal light raspberry lemonade, but I also love the containers to be reused for many things!)

Grouping students by random, as well as with partners
I made a small group set of whisper phones during the school year and they were a big hit so I made some more-I now have a class set.  I figured I can let each student have their own so we don't run into germ issues.  I used two 1 1/2" 90 degree elbow plastic pipes and simply used my zebra duck tape to put together.  I loved using these during small group reading.  This helped filter out the extra noise, as well as encourage softer reading out loud.  I plan on still using them during small group, but also during independent reading.  I thought they would be great to encourage fluency, not only for reading but for math facts as well.
Phonics Phones
So you made it to the end and you're asking...where are the freebies??  I am giving you the animal print numbers and labels that I used for my random containers, as well as several other freebies.  I finally went through my various zip drives and found some things that I never got around to sharing so here they are.....for FREE!!!  The clipart used for all of them are from Scrappindoodles (which I love, love, love!!) 

Animal print numbers 1-30, plus blank

Labels for containers
Next {FREEBIE} is a set of classroom awards.  I loved Cara Carroll's awards (found HERE) that she made- so it inspired me to make my own, tailored to my classroom-I also included a spot for the date and name.  Hers are free on TpT, so I am doing the same (but on Google Docs since I don't have license to give away free stuff on TpT).

Various classroom awards
I tried to give each student one of these per month.  To keep track I used a small pocket chart by my desk (Target $1 bin).  I put their names on the pockets then put a ticket by each name.  When they got an award I would also give them the ticket-for 2 reasons.  1 was to keep track of who still needed an awarda and the other was for our weekly drawing.  We use PBiS at our school so the tickets were mainly used for whole school awards.  I also started drawing names at the end of the week to earn bonus stamps for their behavior card.  If you've been following me you know that I don't do tangible class prizes.  I use a catalog of privileges that can be earned each time a card is full of stamps.

To be prepared, I printed many copies of each award on colored paper.  I then used 3 large coupon holders (Dollar Store) to divide them up by award and keep seperated.  Now they are easy to find and hand out!

Next {FREEBIE} is a gameboard.   I love making games out of the simplest learning activities.  So I made a jungle themed gameboard that can be used for any set of cards/game.  An example would be to take a cup of coins and pull out 5 coins.  Count them correctly and you get to roll and move along the game board.  If you are incorrect, stay where you were.
Jungle gameboard to be used for any game

Enjoy the {FREEBIES}!  Just in time to celebrate 200 followers!  Woohoo!!